|
How
it All Played Out
or
Wooden
Men and Iron Ships
by
Peter
Hunt
In
early April the Entente fleet under Admirals Hunt and Hall sailed out
confidently to meet the Triple Alliance under Admirals Herbert and Bishop.
Given that both sides were equal in points and numbers it was likely
that we were heading for an enjoyable, but inconclusive day’s play in the
biggest naval battle we had, yet, staged.
The Mediterranean ambiance was enhanced by Jeff laying on one of his
exquisite seafood stews and, with the admirals suitably replete, battle
commenced.
The
Scouts Meet
The
British had a cunning plan for the cruiser action which entailed the British
armoured cruisers taking on the Italian fast battleships at long range.
At this range the stronger British armour but weaker firepower would
balance the Italian weaker armour but stronger firepower resulting in an
equal battle, whereas at extreme or normal range the Italians would have the
advantage. Whilst this was going
on the French and British armoured and protected cruisers were to pick off
their weaker Austrian. German
and Italian counterparts, burst through them and locate the Triple Alliance
battle fleet. So much for the
plan …
From
the flag
bridge
of
HMS
Triumph Admiral Hall surveyed the enemy line.
His main target, the Italian fast battleships, was well to the rear
of the Triple Alliance formation but the Italian protected cruisers were
bearing towards him offering a tempting target ~ too tempting.
After a brief exchange of signals with his French colleague the
original battle plan went out of the window and Hall altered course to
starboard to bring his line to bear on the Italian light ships.
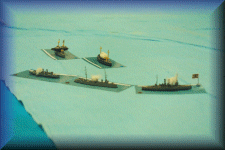 At
first Hall’s initiative seemed to pay dividends as his much stronger ships
pummelled the Italian lights and the Entente crews rejoiced at the sight of
three enemy ships sinking and crippled in short order.
However the course change had two effects which were to spell doom
for the Entente. Firstly the
British armoured cruiser were now heading between two Triple Alliance
columns, one consisting of the Italian, Austrian and German protected
cruisers and the other of the much further away Italian battleships.
This was bad enough but when the Italian battleships turned into line
of battle towards the other column Hall found his “T” almost crossed and
under fire simultaneously from the battleships ahead and the Triple Alliance
cruisers on his port beam. The
French squadron, which had been to starboard of Hall’s squadron, was
largely masked by the British armoured cruisers and to clear its arcs was
pushed further to starboard taking it away from its natural targets, the
Triple Alliance lights, and bringing it into the fire of the Italian
battleships. Insult was added to
the Entente’s injury when the Italian battleships stopped dead in the
water in order to maintain their superior firing position! At
first Hall’s initiative seemed to pay dividends as his much stronger ships
pummelled the Italian lights and the Entente crews rejoiced at the sight of
three enemy ships sinking and crippled in short order.
However the course change had two effects which were to spell doom
for the Entente. Firstly the
British armoured cruiser were now heading between two Triple Alliance
columns, one consisting of the Italian, Austrian and German protected
cruisers and the other of the much further away Italian battleships.
This was bad enough but when the Italian battleships turned into line
of battle towards the other column Hall found his “T” almost crossed and
under fire simultaneously from the battleships ahead and the Triple Alliance
cruisers on his port beam. The
French squadron, which had been to starboard of Hall’s squadron, was
largely masked by the British armoured cruisers and to clear its arcs was
pushed further to starboard taking it away from its natural targets, the
Triple Alliance lights, and bringing it into the fire of the Italian
battleships. Insult was added to
the Entente’s injury when the Italian battleships stopped dead in the
water in order to maintain their superior firing position!
The
Entente quickly paid the price for their tactical imprudence.
The British armoured cruisers could not go forward without bringing
themselves into short range of the Italian battleships and the French could
not give them decisive support. Both
squadrons were quickly devastated by the Triple Alliance fire and the
British armoured cruisers were done for before the French could close the
stopped Italians and bring them under torpedo fire.
A long-range torpedo hit on an Italian battleship gave some
consolation to the Entente but it didn’t alter the outcome.
With the writing on the wall the relatively untouched British
protected cruisers attempted to get away and pick off some
Alliance
cripples in the process. But
once the Entente heavier cruisers were sunk or crippled the British lights
soon followed them, going down in a confused torpedo and short range gunnery
melee.
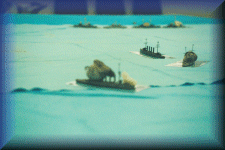 As
they dispatched the Entente cripples the
Alliance
admirals counted their own cost ~ the Austro-German squadron was largely
untouched whereas the Italians had lost several ships with more crippled,
but recoverable. Still this was
a small price to pay for destroying all the British cruisers and fulfilling
their main duty. For the plumes
of smoke on the western horizon showed them the location of the Entente
battle fleet, and their own battleships would be able to use this decisive
scouting advantage to deploy to meet it as they saw fit. As
they dispatched the Entente cripples the
Alliance
admirals counted their own cost ~ the Austro-German squadron was largely
untouched whereas the Italians had lost several ships with more crippled,
but recoverable. Still this was
a small price to pay for destroying all the British cruisers and fulfilling
their main duty. For the plumes
of smoke on the western horizon showed them the location of the Entente
battle fleet, and their own battleships would be able to use this decisive
scouting advantage to deploy to meet it as they saw fit.
The Juggernauts Collide
The
two main battlefleets had adopted very different cruising formations.
As events were to show both formations left much to be desired.
The
Triple Alliance disposed their squadrons in two columns of line ahead.
To port the squadron of German Brandenburgs led the squadron of
Kaisers. Away to starboard the
Austrian squadron led the Italian battleships.
The destroyers and torpedo boats were tucked away from harm behind
the battleships. The two columns
were over a mile apart and there was also about half a mile’s separation
between the two squadrons in each column.
Thus the Alliance
formation was spread out. Individual
squadrons were not well placed to support each other but each squadron had
plenty of sea room to manoeuvre.
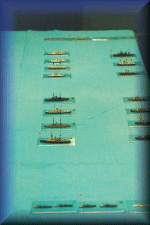 In
complete contrast the Entente formation was very compact, being composed of
two lines of squadrons in line abreast.
The first line consisted of the 1st BS to port, closest to
the Alliance, 2nd
BS to starboard. Behind them
came the 3rd BS and French squadron respectively.
The British destroyers were deployed in line ahead to the port of
this box and the French destroyers to starboard.
Admiral Hunt was confident that he could manoeuvre this compact
formation easily and it could be deployed to line ahead on either flank to
make a single battle line by turning the line abreast squadrons to line
ahead. As it turned out Admiral
Hunt proved to be too confident in his manoeuvring ability by half. In
complete contrast the Entente formation was very compact, being composed of
two lines of squadrons in line abreast.
The first line consisted of the 1st BS to port, closest to
the Alliance, 2nd
BS to starboard. Behind them
came the 3rd BS and French squadron respectively.
The British destroyers were deployed in line ahead to the port of
this box and the French destroyers to starboard.
Admiral Hunt was confident that he could manoeuvre this compact
formation easily and it could be deployed to line ahead on either flank to
make a single battle line by turning the line abreast squadrons to line
ahead. As it turned out Admiral
Hunt proved to be too confident in his manoeuvring ability by half.
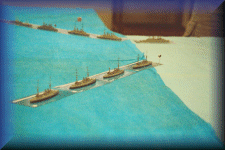 Taking full advantage of their scouting superiority the
Alliance
deployed off the port bow of the Entente formation.
Admiral Bishop realized that with their fleet’s dispersed cruising
formation his lead squadron of
Brandenburgs
could
find themselves engaged by several Entente squadrons before the other Alliance
squadrons could come to their assistance.
To prevent this the Brandenburgs
turned
about to parallel the Entente course whilst the Kaisers turned 90 degrees to
port to bring them across the Entente track.
Eventually this would bring the Brandenburgs
in
behind the Kaisers reversing the order of the port column.
Whilst this was going on Admiral Herbert was trying to bring the
starboard column across and into the action. Taking full advantage of their scouting superiority the
Alliance
deployed off the port bow of the Entente formation.
Admiral Bishop realized that with their fleet’s dispersed cruising
formation his lead squadron of
Brandenburgs
could
find themselves engaged by several Entente squadrons before the other Alliance
squadrons could come to their assistance.
To prevent this the Brandenburgs
turned
about to parallel the Entente course whilst the Kaisers turned 90 degrees to
port to bring them across the Entente track.
Eventually this would bring the Brandenburgs
in
behind the Kaisers reversing the order of the port column.
Whilst this was going on Admiral Herbert was trying to bring the
starboard column across and into the action.
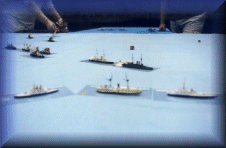 It was the seeming vulnerability of the
Brandenburgs
that
led to the Entente’s defeat. Hunt’s
cruising formation had been designed to allow for deployment on either flank
by turning the first line of ships into line ahead and then making a turn to
deploy. After the first line
deployed the second line would carry out the same manoeuvre and tag on behind
the leading two squadrons. Thus,
with the Alliance
deploying ahead and to port of him Admiral Hunt was in a similar situation
to that of Jellicoe at
Jutland
. Should he deploy to port, and bring his line closest
to the Alliance, or to
starboard, further away but allowing more time to complete the manoeuvre?
At Jutland Jellicoe considered the information he had in the light of
his experience and deployed the Grant Fleet to the best advantage.
Now however Admiral Hunt showed that he was not of Jellicoe’s
calibre. Instead of sticking to his plan, instead of ordering a deployment
to port or starboard, Hunt threw all of this away in the hope of destroying
the Brandenburgs
quickly.
He ordered the first
line to deploy to starboard and the second line to port!
To make matters worse instead of deploying by line he deployed by
squadron in order to bring as many ships as possible to bear on the Brandenburgs
Thus, instead of one single continuous line of four squadrons the
Entente ended up with four separate squadron lines. By contrast the Germans
fought in one line whilst the Austrian and Italian squadrons came up as fast
as they could whilst keeping their firing arcs clear. It was the seeming vulnerability of the
Brandenburgs
that
led to the Entente’s defeat. Hunt’s
cruising formation had been designed to allow for deployment on either flank
by turning the first line of ships into line ahead and then making a turn to
deploy. After the first line
deployed the second line would carry out the same manoeuvre and tag on behind
the leading two squadrons. Thus,
with the Alliance
deploying ahead and to port of him Admiral Hunt was in a similar situation
to that of Jellicoe at
Jutland
. Should he deploy to port, and bring his line closest
to the Alliance, or to
starboard, further away but allowing more time to complete the manoeuvre?
At Jutland Jellicoe considered the information he had in the light of
his experience and deployed the Grant Fleet to the best advantage.
Now however Admiral Hunt showed that he was not of Jellicoe’s
calibre. Instead of sticking to his plan, instead of ordering a deployment
to port or starboard, Hunt threw all of this away in the hope of destroying
the Brandenburgs
quickly.
He ordered the first
line to deploy to starboard and the second line to port!
To make matters worse instead of deploying by line he deployed by
squadron in order to bring as many ships as possible to bear on the Brandenburgs
Thus, instead of one single continuous line of four squadrons the
Entente ended up with four separate squadron lines. By contrast the Germans
fought in one line whilst the Austrian and Italian squadrons came up as fast
as they could whilst keeping their firing arcs clear.
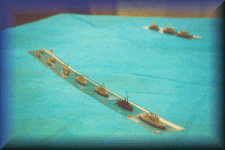 The
battle opened with the Alliance
picking off the British destroyers at extreme range.
The British 1st and 3rd BSs engaged the Brandenburgs
whilst
the 2nd BS and French squadrons, masked by the first two
squadrons, got shots in when they could.
This weight of fire soon told on the Brandenburgs,
sinking one and damaging the others. This
promising start was illusory however. Soon
the Kaisers came into play, then the Austrians and finally the Italians.
By this time, in effect two British squadrons were facing four Triple
Alliance squadrons whilst the remaining masked Entente squadrons frantically
manoeuvred to bring their guns to bear.
These odds couldn’t be sustained and soon the newest and the oldest
battleships in the Entente fleet were crippled or sinking.
Although all of the Kaisers were heavily damaged none of them were
crippled and only one Brandenburg
was
sunk ~ the result was a decisive victory for the Triple alliance.
As the last British squadron and their French allies attempted to
break off, covered by an attack from the French torpedo boats, the German,
Austrian and Italian crews celebrated their own “New Trafalgar”.
Admirals Hunt and Hall had proven that they were no Jellicoes or
Nelsons. One hundred years of
naval supremacy had been brought to an end. The
battle opened with the Alliance
picking off the British destroyers at extreme range.
The British 1st and 3rd BSs engaged the Brandenburgs
whilst
the 2nd BS and French squadrons, masked by the first two
squadrons, got shots in when they could.
This weight of fire soon told on the Brandenburgs,
sinking one and damaging the others. This
promising start was illusory however. Soon
the Kaisers came into play, then the Austrians and finally the Italians.
By this time, in effect two British squadrons were facing four Triple
Alliance squadrons whilst the remaining masked Entente squadrons frantically
manoeuvred to bring their guns to bear.
These odds couldn’t be sustained and soon the newest and the oldest
battleships in the Entente fleet were crippled or sinking.
Although all of the Kaisers were heavily damaged none of them were
crippled and only one Brandenburg
was
sunk ~ the result was a decisive victory for the Triple alliance.
As the last British squadron and their French allies attempted to
break off, covered by an attack from the French torpedo boats, the German,
Austrian and Italian crews celebrated their own “New Trafalgar”.
Admirals Hunt and Hall had proven that they were no Jellicoes or
Nelsons. One hundred years of
naval supremacy had been brought to an end.
In Retrospect
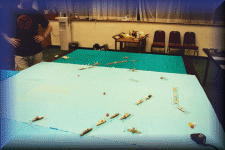 This
game was set up because we wanted something a bit more interesting than the
normal set piece battle. Even so
the game was based on equal points and equal numbers to give both sides an
equal chance. The abject failure
of the Entente was nothing to do with the quality or number of their ships,
and with so many ships involved luck of the dice balanced out too.
They lost because their tactics were bad and in both the cruiser
action and the fleet action the Triple Alliance got all their squadrons into
action whilst the Entente masked many of theirs. This
game was set up because we wanted something a bit more interesting than the
normal set piece battle. Even so
the game was based on equal points and equal numbers to give both sides an
equal chance. The abject failure
of the Entente was nothing to do with the quality or number of their ships,
and with so many ships involved luck of the dice balanced out too.
They lost because their tactics were bad and in both the cruiser
action and the fleet action the Triple Alliance got all their squadrons into
action whilst the Entente masked many of theirs.
All
of this is a tribute to Phil Barker’s rules.
There can be few sets of naval rules where you can use nine squadrons
a side, with a total of over 80 ships, in two games over less than seven
hours play where the deciding factor is the skill of the player admirals.
As with any set of rules play reveals anomalies and after this game
we tweaked the rules to deter stopping functional ships, to make smaller
ships harder targets at longer ranges, to prevent cripples being ignored by
their own side, and to tinker with points values.
These were only minor points which did not really affect the final
outcome. The Entente lost
because they made mistakes. The
rules allowed the Triple Alliance to chastise these mistakes ~ good rules
and good play by the
Alliance
determined the outcome.
back
to other periods
|